
Image Map

Showing posts with label gifts. Show all posts

Friday, December 14, 2018

On Trend: Modern Heirlooms

Adding a personal touch to your home is just that - personal!

A trend we see every year is taking old traditions in your family and putting a fresh twist on them! 


We worked with AmyBeth to add this super special custom touch to her home. Her Grandmother's cookie recipe is the perfect addition to her space!

AmyBeth added this to the side of the panel next to her refrigerator. A perfect spot for a decal! It's one of those spaces that you don't normally want to add a nail to hang anything but it such a lovely blank slate waiting for some fun!

I was so inspired by AmyBeth's space, I just had to do this with one of my families recipes too! Here is my version:


I put mine on a wall that has a pocket door behind it - another perfect place for a decal! This is a recipe that my grandmother used to make all the time and has become a staple at any family gathering.

Then I shared it with my mom who of course wanted one for herself! She doesn't have the wall space in her home for a decal of this size, so I made this design into an Art Print as well! 


Did you know we offer gallery quality giclĂ©e print produced with a whole lotta love and skill on matte, white, semi-smooth, 100% cotton rag, acid and lignin free archival paper using Epson K3 ultrachrome archival inks with an unprinted border for framing.

Send us an email (info@wallquotes.com) with your family recipe and we would be happy to send a proof to get your own heirloom added to your home!

Cheers!
Liz

Monday, January 27, 2014

Vinyl Frame Tutorial

vinyl frame tutorial 1

Hello, All! Today, I'm so excited to share a vinyl frame tutorial with you all that would be the perfect gift for Mother's Day, a birthday, or even an anniversary! It's easily customizable and a quick craft to complete, as well. Here's the how-to:

Step 1: All you need for this project are this decal from Belvedere Designs, a frame, and a picture (even a pretty piece of patterned paper or fabric would do)!
 
First time working with vinyl decals? Don't be nervous. Belvedere Designs includes a handy instruction enclosure to help you through the process, plus, an application squeegee to ensure your vinyl creations turn out perfectly. Detailed photo tutorials are also available on their site.
 
DSC_0007

Gather your supplies, and get ready to begin....

vinyl frame tutorial 3

Step 2: Let's begin! We'll be doing this in two parts. We'll first apply the decal to the top of the frame, followed by the decal at the bottom of the frame. Cut your decal in half, position the pieces where you want them, and apply a piece of tape to each to hold them in place.

vinyl frame tutorial 4

Step 3: Using the tape as a hinge, flip up decals and peel off backing. Lay decals back down carefully...

vinyl frame tutorial 5

Step 4: Starting from the center, squeegee the vinyl decals firmly.

vinyl frame tutorial 6

Step 5: Carefully peel back the transfer tape. To do this, start at a corner and peel the transfer tape off at a 180 degree angle-back and down rather than up and away. If necessary, use your fingers to press down on the letters as you peel back the tape.

vinyl frame tutorial 7

And that's it!

vinyl frame tutorial 2

I don't know a mom or grandmother out there who wouldn't love this! This would also make a quick and fun project for a craft night or girl's night in! Head over to Belvedere Designs to pick up this, or one of their many other, vinyl decals!

Tuesday, December 17, 2013

Gift Guide #5-For Your Niece, Who is 3 Going on 30

She's part sassy, part sweet, and 100% adorable. She loves to help decorate cookies (the pink sprinkles are her favorite), watch Sesame Street, and finger paint. Get her a gift that lets her know how much you adore everything about her.
 
 
Land of Nod Cottage Dollhouse, because she loves playing the old dollhouses you and your sister used to play with, and you think it's time for her to have one of her very own.
 

"And though she be little, she is fierce" Wall Quotes™ decal, because it tells you everything you need to know about her.
 
 
Custom Bookplate Rubber Stamp, because she adores reading and would love being able to leave her mark on her collection of books.
 

The beloved classic, Blueberries For Sal, to give her even more practice using her new bookplate rubber stamp. 


This Instagram-inspired wooden camera may just be the cleverest thing you've seen in a while, and you know your niece, who never misses a chance to pose for a camera, would agree.
 
 
A shimmery, tulle tutu, because every princess needs one.
 
 
My First Piano, to share your love of music with her.
 
 
Colored Pencil Postcards, because you got one for yourself as well and think it would be a neat way to creatively keep in touch.


Wednesday, September 11, 2013

Grandkids Photo Board Tutorial


Hello there, Belvedere Designs fans! This is Linda, from burlap+blue, and I am so excited to be here with another great tutorial using decals from Belvedere Designs. This Grandkids Photo Board is the perfect gift for the grandparents of your little ones...what grandparent doesn't love showing off their grandkids?! Here's the how-to:

Materials:
wooden board
clothespins or metal clips (3)
 
 
Step 1: Gather your supplies, and get ready to apply your vinyl. First time? Don't be nervous. Belvedere Designs includes a handy instruction enclosure to help you through the process, plus, an application squeegee to ensure your vinyl creations turn out perfectly. Detailed photo tutorials are also available on their site.
 
To purchase the decal that I used for this piece, click here! You can also go to the Design Center, where you can create your own design! This is 100% customizable, which I love!
 
 
Step 2: Let's begin! We'll be doing this in several parts. We'll first apply the "grandkids" decal, followed by the "make life grand" decal, then we'll attach the clothespins or clips.
 
I used a 20.5" x 8" board that my husband cut, but you can easily find wooden boards at Michaels or Hobby Lobby. The vinyl decal that I used measured approximately 20" x 5" (this is the finished size after it was applied to the wood). You'll want to make sure you have a bit of space under the decal for attaching your clips!
 
First up, place the "grandkids" decal where you want it, and use a piece of tape to hold it in place. Using the tape as a hinge, flip up decal and peel off backing. Lay decal back down carefully...
 
 
....and starting from the center, squeegee the vinyl decal firmly.
 
Step 3: Carefully peel back the transfer tape. To do this, start at a corner and peel the transfer tape off at a 180 degree angle-back and down rather than up and away. If necessary, use your fingers to press down on the letters as you peel back the tape.
 
 
Step 4: Following the same steps, apply the words "make life grand" centered underneath "Grandkids."
 
 
Step 5: Using hot glue, attach your clothespins or metal clips to the bottom of your board. I found that three fit nicely, if you have a larger board, you may want to use four.


And you're done! I don't know a grandparent out there who wouldn't love this, and I adore the fact that the pictures are so easy to change out!
 
Head over to Belvedere Designs now to check out these new and fabulous vinyl decals!

Wednesday, September 4, 2013

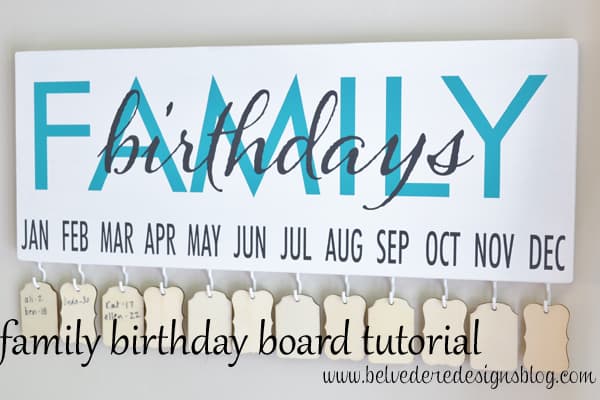
Family Birthday Board Tutorial


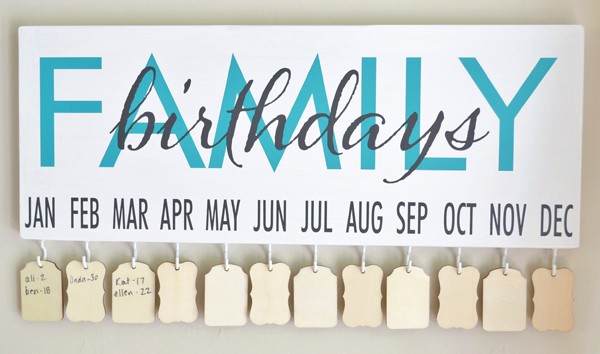
Hello, Belvedere Designs fans! This is Linda, from burlap+blue, and I am so excited to be here with another great tutorial using vinyl from Belvedere Designs. This family birthday board is a creative and super cute way to remember the birthdays of your favorite people. Just purchase a stack of pretty cards and stamps, and your loved ones will feel extra special knowing that you remembered their special day. Here's the how-to:
 
Materials:
wooden board
cup hooks (12)
wooden (or paper) gift tags (12)
 
 
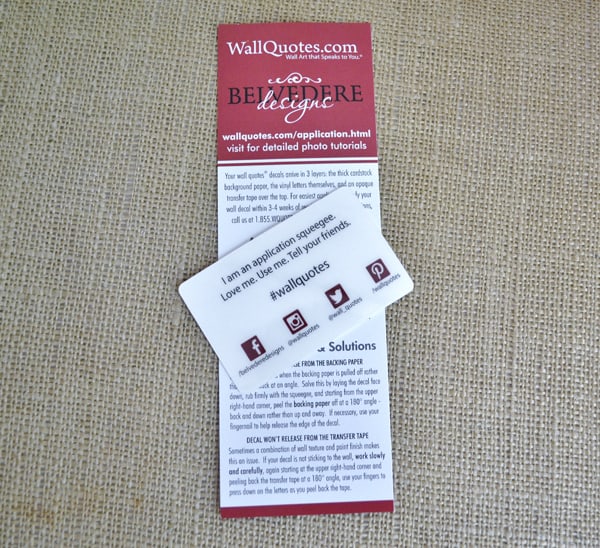
Step 1: Gather your supplies, and get ready to apply your vinyl. First time? Don't be nervous. Belvedere Designs includes a handy instruction enclosure to help you through the process, plus, an application squeegee to ensure your vinyl creations turn out perfectly. Detailed photo tutorials are also available on their site.

To purchase the decal that I used for this piece, click here! You can also go to the Design Center, where you can create your own design and choose your own fonts and colors! Instead of the word "family", you could even substitute your own last name! This is 100% customizable, which I love!
 
 
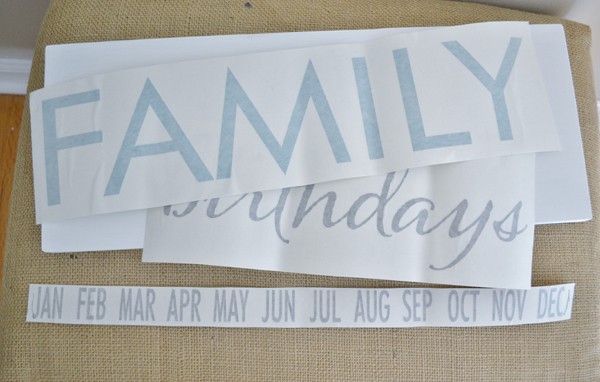
Step 2: Let's begin! We'll be doing this in several parts. We'll first apply the "family" decal, followed by the "birthdays" decal, then the decal of the months. Lastly we'll insert the cup hooks.
 
I used a 17.5" x 7" board that my husband cut, but you can easily find wooden boards at Michaels or Hobby Lobby. The vinyl decal that I used measured approximately 16" x 6" (this is the finished size after it was applied to the wood).
 
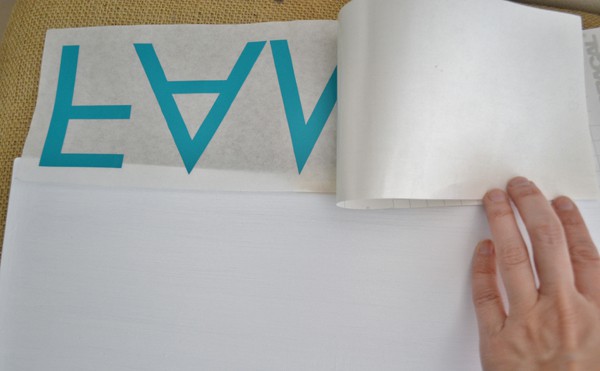
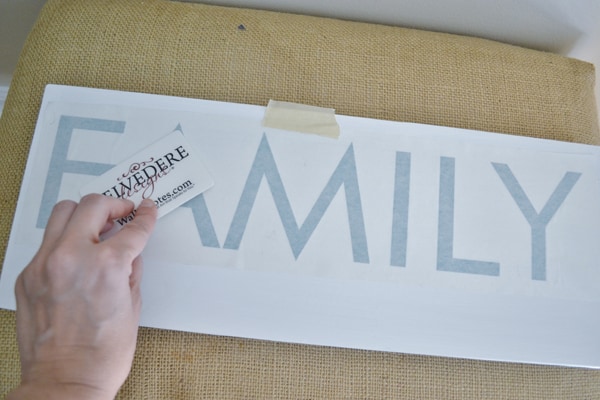
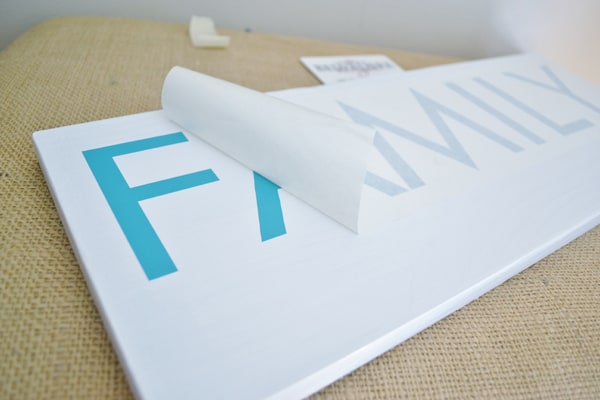
First up, place the "family" decal where you want it, and use a piece of tape to hold it in place. Using the tape as a hinge, flip up decal and peel off backing. Lay decal back down, and starting from the center, squeegee the vinyl decal firmly.
 
 
Step 3: Carefully peel back the transfer tape. To do this, start at a corner and peel the transfer tape off at a 180 degree angle-back and down rather than up and away. If necessary, use your fingers to press down on the letters as you peel back the tape.
 
 
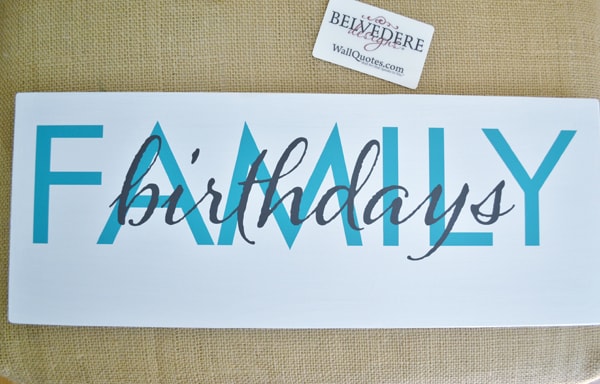
Step 4: Following the same steps, apply the word "birthdays" centered over the word "family."
 
 
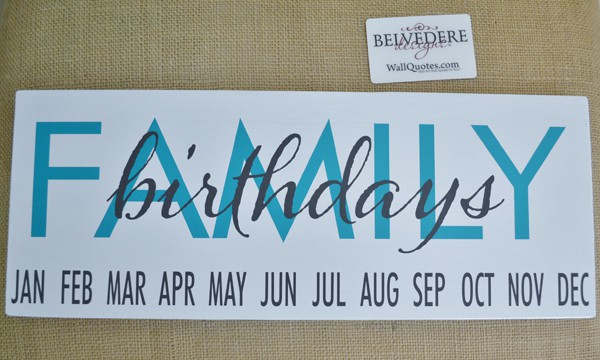
Step 5: Following the same steps as you did for the words "family" and "birthdays", apply the decal of the months at the bottom of your board.
 
 
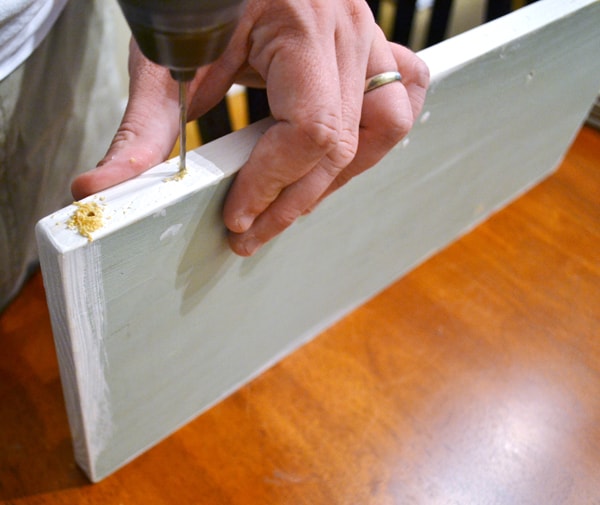
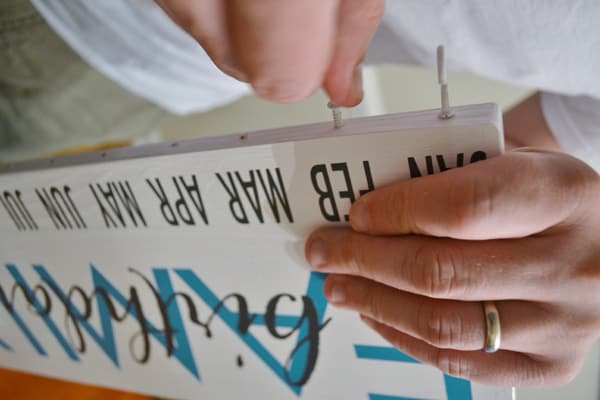
Step 6: The vinyl is applied, and now it's time to insert your cup hooks. We used a drill (with a 3/16th bit) to drill holes before screwing in the cup hooks, but, if you don't have a drill, I think you could easily use some command hooks instead. Just be sure to leave some space underneath your months to apply the command hooks.
 
Step 7:
 
Add some gift tags with the names/birthdates written on them (I found mine at Michaels), and hang on your hooks.
 
 
And you're done! I am so in love with the finished product...so cute!
 
Head over to Belvedere Designs now to check out these new and fabulous vinyl decals!

Wednesday, August 14, 2013

Personalized Ceramic Platter Tutorial


Hello, Belvedere Designs fans! This is Linda, from burlap+blue, and I am thrilled to be collaborating with Belvedere Designs on a series of tutorials sharing the wide range of fun and creative ways to use vinyl! First up, I am so excited to share this personalized, ceramic platter using vinyl from Belvedere Designs. It's perfect as a wedding or anniversary gift, or even as a holiday gift for that hard-to-buy-for couple. It was quick and easy to create, here's the how-to:

Materials:
ceramic platter (I found mine at Home Goods)
plate stand
Step 1: Gather your supplies, and get ready to apply your vinyl. First time? Don't be nervous. Belvedere Designs includes a handy instruction enclosure to help you through the process, plus, an application squeegee to ensure your vinyl creations turn out perfectly. Detailed photo tutorials are also available on their site.

For reference, my platter is approximately 11" in height and 12.5" in length. The vinyl that I used is 6" in height by 9" in length.

To purchase the decal that I used for this piece (you can obviously change the name, initial and colors), click here! You can also go to the Design Center, where you can create your own monogram design and choose your own fonts! This is 100% customizable, which I love!
Step 2: Let's begin! We'll be doing this in two parts. First, we'll apply the monogram initial, and then we'll apply the last name vinyl. Take your initial vinyl, and center it on your platter. Use a piece of tape to hold it in place. Using the tape as a hinge, flip up decal and peel off backing. Lay decal back down, and starting from the center, squeegee the vinyl decal firmly.
Step 3: Carefully peel back the transfer tape. To do this, start at a corner and peel the transfer tape off at a 180 degree angle-back and down rather than up and away. If necessary, use your fingers to press down on the letters as you peel back the tape.
Step 4: Halfway there! Following the same steps, remove the backing paper from the last name decal, and position it over the initial.
Step 5: Squeegee decal, carefully peel back the transfer tape, and voila! A personalized and beautiful gift that everyone will love.
Head over to Belvedere Designs now to check out these new and fabulous vinyl decals!