
Image Map

Showing posts with label Monograms. Show all posts

Wednesday, May 15, 2019

3 Easy Ways to Spruce up Your Mailbox This Spring


It's that time of year - the sun is finally out of hibernation and things are starting to grow! I don't know about you, but my house needs plenty of TLC to be ready for front-porch sittin' and sweet tea sippin' come summertime.

I'm tackling several outdoor projects to up my home's curb appeal this month, but one of the simplest things I'm doing this spring is to spruce up my mailbox with a little elbow grease and simple, affordable, easy-to-apply vinyl decals.  It's usually the first thing anyone sees - and in my rural area, the only way address numbers are displayed.  You can never underestimate the power of a first impression, right?

Here are three easy ways to improve your home's curb appeal too by dressing up that lovely hardworking mailbox - she who receives a steady flow of online purchases (yay!), happy mail from friends and family (super yay!), and even monthly bills (less yay, for sure, but still valuable).

1. Weed, Trim, Clean up


Remember, the mailbox is the first thing visitors see and sets the tone for your whole home's curb appeal.  Keep her neat and tidy by pulling up the weeds, trimming the grass, and if by chance you've got a chronic litter problem (speaking from experience here, sigh), keep that trash picked up.

Less than a minute pulling weeds here and there as you go to pick up the mail each day will make a big difference.

2. Plant Flowers


Spring is the perfect time to add a little color to your mailbox.  Clear out an area around it, however large or small works for your space and time.  Then plant with anything from wildflower seeds (such a pretty assortment of color and heights) to petunias or marigolds (bright and happy colors) or hostas (lots of big, bushy, vibrant greenery).

Even a small burst of color (green or otherwise) goes a long way to welcoming guests and making your space lovely and inviting. I went for petunias this year in bright and happy white and red.

3. Add a Mailbox Decal


In my area, the mailbox is also the address marker for our home and so my address number needs to be big and easy to read. But that doesn't mean it shouldn't also be beautiful!

Perhaps you thought that vinyl decals for the wall wouldn't work on a mailbox? Not so! Vinyl decals are the perfect complement and come in a myriad of colors and styles to complement your home's style and your own personality.

Add your last name and monogram to the mailbox for a lovely traditional touch, or bright colored hexagons and circles for a modern flair. Add floral or tree designs for a natural style or something elegant and sophisticated to set the tone. You can even design your own decal for the perfect custom touch.

Even if all you need are the address numbers, make them pretty!

Wallquotes.com has a stunning collection of custom mailbox decals to help you make your mailbox stand out in the neighborhood and spruce up your whole home's curb appeal. And if by chance you don't see what you'd like in our collections, please contact us! We'd be delighted to create a special custom decal just for you and your home.

Here's to great first impressions and one project closer to the front-porch-sittin' summertime.


Thursday, June 15, 2017

Off the Wall: Milkcans

Wall Quotes are perfect for more than just walls!


Just take a look at this lovely milkcan! We created this custom decal for a customer who made this as an anniversary present and we think it turned out just amazing (but we might be biased). 

This is just one example!


Milkcans are hot right now! They bring a little of that farmhouse style we all fell in love with after our first episode of Fixer Upper! We had another customer create this design as the perfect accent on her porch and we cut it in our outdoor vinyl so there was no concern leaving it outside. It is the perfect customization to make your house feel like home! 

Have an off the wall project in mind? Contact our designers at info@wallquotes.com or get started in our Design Center! 

I'll share some more off-the-wall ideas with some of our existing decals soon too! They don't always have to be a custom piece.

Cheers!
Liz


Tuesday, September 1, 2015

August 2015 Customer Photo Winner


How cool is this project? Jamie contacted our designers to create this custom design for his mantel. We were happy to work with Jaime to get the perfect design for his rustic home. The Copper color really pops against the stone of the fireplace! Great choice Jaime!

Have an idea in mind that you are not finding online? Our awesome designers are happy to work with you one-on-one to create a one of a kind design for your home, office, church, school, or anywhere! Reach them at info@wallquotes.com.

Don't forget to submit your own photo of your new decal in action (teehee) for the chance to win $50 in shop credit (wahoo!).  Or, tag us @wallquotes on Instagram or @belvederedesigns on Facebook.


We can't wait to see what our customers come up with next! 

~Liz

Saturday, April 19, 2014

Personalized Vinyl Tumblers Tutorial

personalized tumber 05 copy

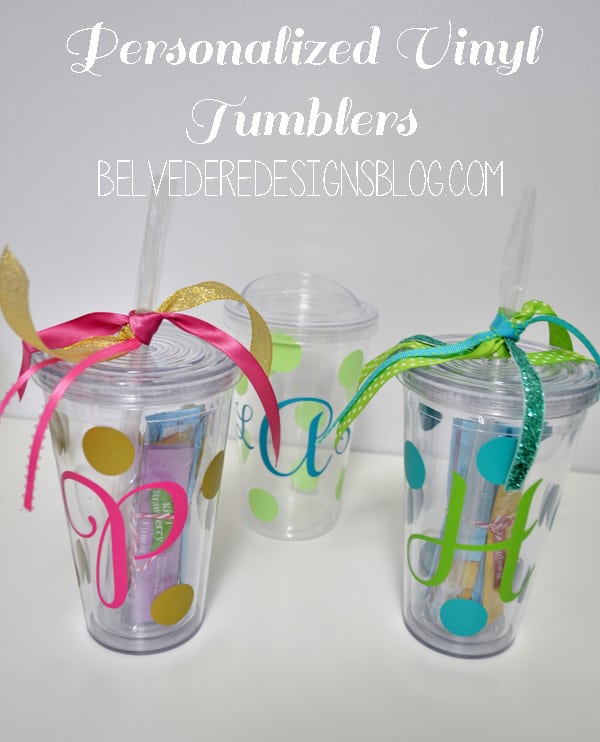
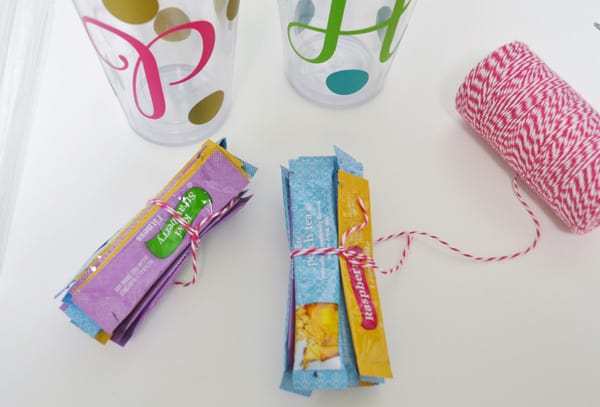
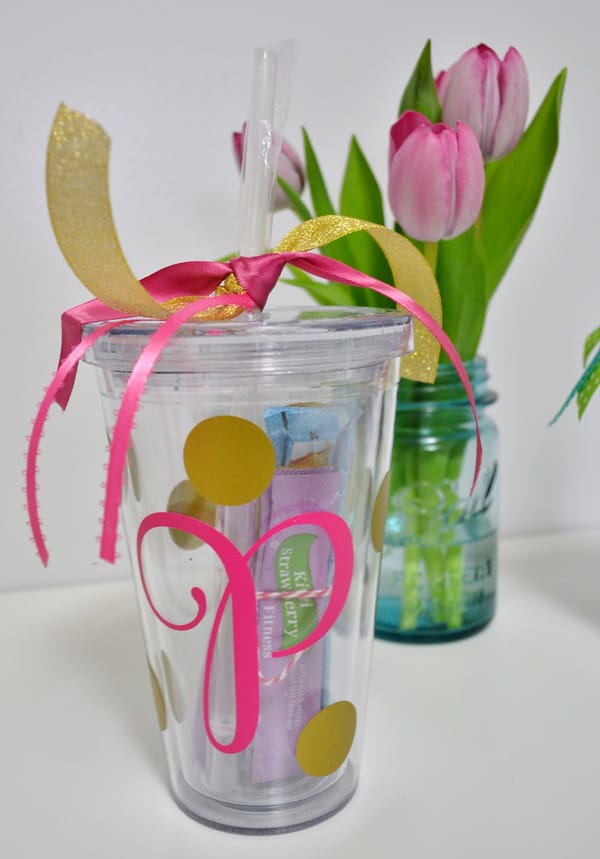
Hello, Wall Quotes™ decals fans! Today, we're sharing a fun and easy vinyl project that is perfect for Summer! These vinyl acrylic tumblers would also make a perfect end-of-the-year thank you gift for your child's teacher...just fill with a gift card or single serve Crystal Light packets, tie with a ribbon, and you have an amazing gift that anyone would love!

Here's the how-to:
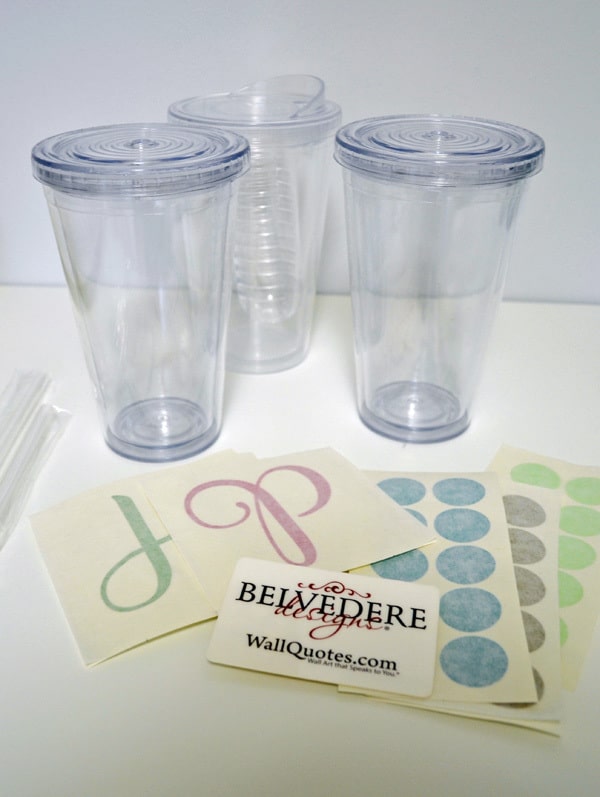
Step 1: All you need for this project are the decal kits from Belvedere Designs (click here for the Single Monogram Tumbler Decal Kit, and here for the Triple Monogram Decal Kit) and plain acrylic tumblers (I used these from Amazon).
 
First time working with vinyl decals? Don't be nervous. Belvedere Designs includes a handy instruction enclosure to help you through the process, plus, an application squeegee to ensure your vinyl creations turn out perfectly.
 
DSC_0007

Gather your supplies, and get ready to begin....

personalized tumber 01

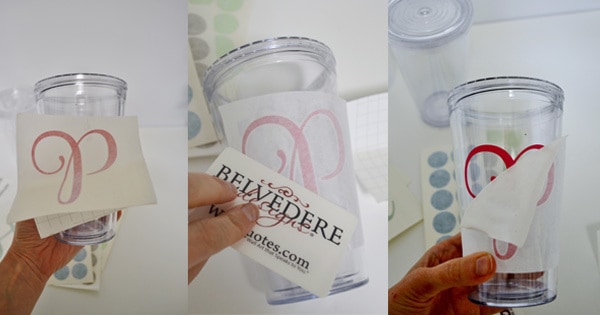
Step 2: Let's begin! We'll be doing this in two parts. We'll first apply the initial decal and then we'll apply the polka dot decals. First, place the initial on the cup, and, using the tape as a hinge, flip up decals and peel off backing. Lay decal back down carefully. Starting from the center, squeegee the vinyl decals firmly. Carefully peel back the transfer tape. To do this, start at a corner and peel the transfer tape off at a 180 degree angle-back and down rather than up and away. If necessary, use your fingers to press down on the letters as you peel back the tape.

personalized tumber 02

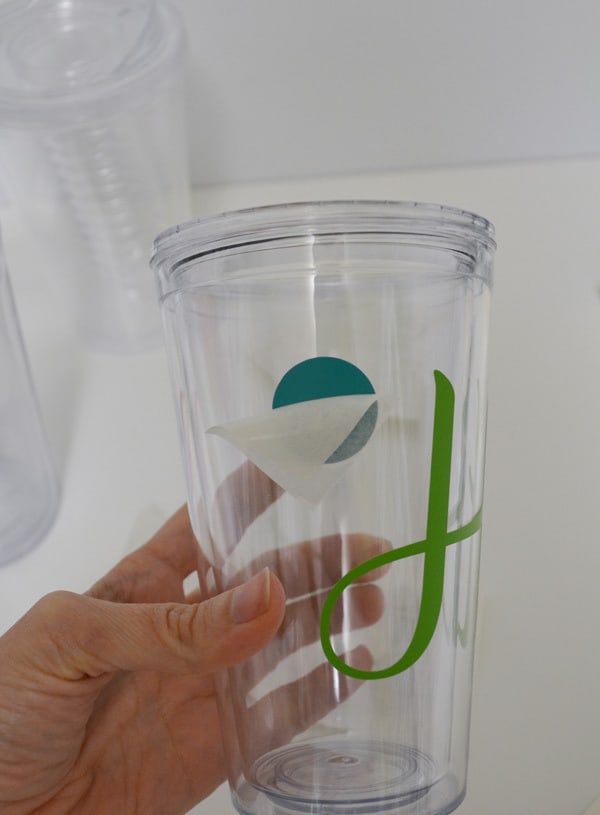
Step 3: Using the same technique, apply each of your polka dots onto your tumblers.

personalized tumber 03

And that's it! I made two for my son's preschool teachers and filled with them single serve drink packets. I kept the third tumbler for myself :)

personalized tumber 04

I don't know anyone who wouldn't love one of these.

personalized tumber 06

Head over to Belvedere Designs to pick up this, or one of their many other, vinyl decals!

Monday, November 9, 2009

My Oh My

Joy at Joys of Home hosted a giveaway for us this last week (which was very exciting). She posted the winners today along with an excellent new way to use our vinyl headboards. Because these are essentially oversized monogram or wall art designs, they really could be used in any number of ways.

Joy's project is phenomenally awesome. All we can say is W.O.W.


You can see the full post (with step-by-step photos and commentary) on her blog.

Also - if you think of creative ways to use our vinyl products, or have already finished a project, let us know! We'd love to see a photo and share your creativity with others.

Thanks again, Joy.

Friday, April 3, 2009

Spring Monograms

I've been recently obsessed with green (I think it's because of the bright spring weather) and so the other day when my little boy went down for a nap, I was on a mission to seriously increase the green quotient in our home. I added bright green ribbon to the towels in the bathroom, green sheets, quilt and pillow to our master bed, and a new green basket on the console table in the entry.

Then, I made this:

Isn't it lovely?

I put it on the bedside table/bookcase in our bedroom. It's the first thing you see when you come in the room and it makes me smile every time - green, glorious green!

I was inspired by this idea here and though this gal created her letters with fabric (and you could do the same with scrapbook paper or by straight up printing the letters from your word processing program), because vinyl is what we do and what we have and is so easy, I used it to create the perfect custom monogram. I already had the frame - in fact, I just had to peel off this quote and it was ready to go. And because I love ribbon and couldn't resist, I added a length around the frame and tied a sweet little bow.

Using vinyl cuts out more than three of the prep steps so you enjoy your art that much faster, it's ultra easy to apply and when you're ready for a different color or a change in your decor - presto! it's easy as pie to remove and start again.

And, because I'm chronically bad at making a decision between two lovely choices, I made two designs and put the extra one on the back door (the same back door the Christmas ornament graced a scant few months ago). I'm digging the floral embellishment big time.

Welcome Spring!

PS - We've got great monogram designs coming in our new site launch. Just a few short weeks to wait. Hooray!